Image Series support guide

Image 2 SoundID Reference setup

Measure your room, export the calibration profile, and store it directly inside both Image 2 monitors. This guide turns the full process into four clear phases with saved progress.
About 30 minutes Measurement microphone required USB connection to each monitor
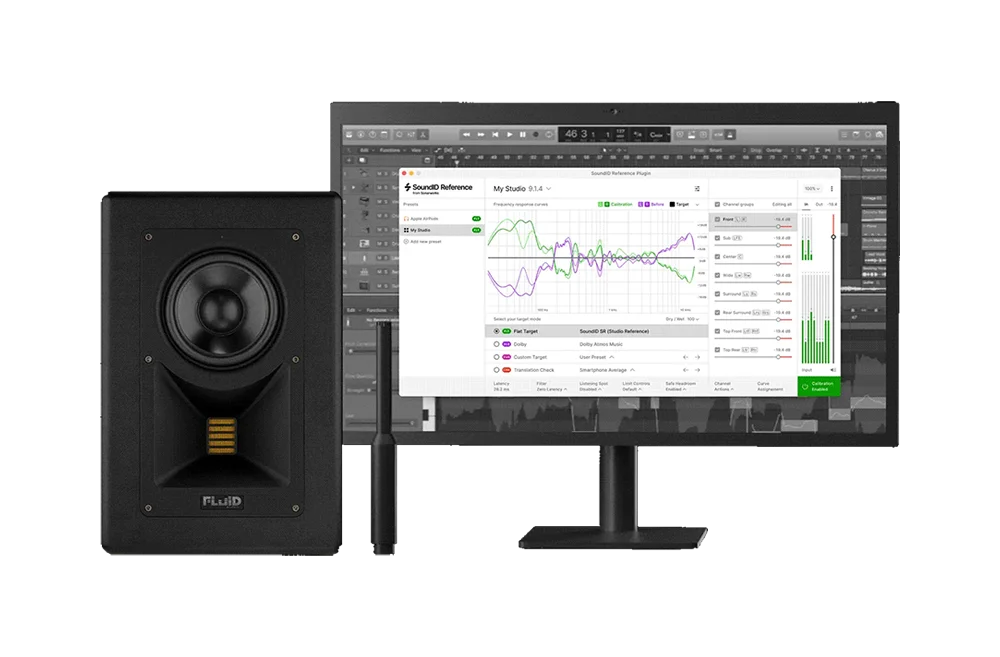
Fluid Professional Image 2 with Sonarworks SoundID Reference
✓Calibration runs inside the monitors after upload. No permanent plug-in is required.
Before you begin

Have these ready

Complete the setup in one session. Keep both monitors in their normal listening positions and avoid changing gain, placement, or room controls after measuring.

Image 2 DCT

Install the latest USB based control tool from Fluid Professional Downloads.

SoundID Reference

Use SoundID Reference for Speakers & Headphones, version 5.6 or newer.

Measurement microphone

Connect it to your audio interface and have its calibration file available if supplied.

Cables and interface

Use the included USB cable, two balanced XLR cables, and your normal audio interface.

01 Prepare both Image 2 monitorsHardware setup and DCT measurement mode
01

Connect and set the monitors

Start with both monitors powered off.

Connect the left and right outputs of your audio interface to the XLR input on each Image 2.
Set the Input switch to Analog.
Set the room controls to their center or zero positions.
Turn the interface output down, power on both monitors, and confirm normal audio playback.
Your interface may run at any sample rate up to 192 kHz. The Image 2 internal DSP operates at 192 kHz and 24 bit.
02

Install the Image 2 DCT

The DCT communicates with one monitor at a time over USB.

Download the correct Image 2 DCT installer for Windows or macOS.
Install the application and follow the on screen instructions.
Close any extra DCT windows. Only one instance should run at a time.
03

Connect the left monitor

Configure the left monitor first.

Connect the included USB cable from your computer to the USB port on the left Image 2.
Power the left monitor on and launch DCT.
Under Loudspeaker and Device, select the COM port or device entry that registered the Image 2.
No device shown? Reconnect USB directly to the computer, power cycle the monitor, and relaunch DCT before trying another cable or USB port.
04

Enable Measurement Mode on the left monitor

DCT temporarily prepares the monitor for the SoundID measurement sweep.

Press Measurement Mode.
Wait while DCT shows the progress of entering this mode.
Confirm the success message.
The Measurement Mode button should turn blue.
05

Repeat Measurement Mode on the right monitor

Both monitors must be prepared before room measurement.

Move the USB cable from the left monitor to the right monitor.
Select the right monitor in DCT.
Repeat steps 3 and 4 until Measurement Mode is active.
When both monitors are prepared, keep them powered on and continue to SoundID Reference.
02 Measure the listening positionSoundID Reference Measure application
06

Install and launch SoundID Reference Measure

Use the Speakers & Headphones edition.

Launch the separate SoundID Reference Measure application.
Allow about 20 to 30 minutes for the guided measurement process.
07

Select the speaker configuration

Choose the configuration that matches your actual monitoring system.

Select your speaker layout in the guided setup.
Complete the on screen checklist before continuing.
Do not move the monitors, listening position, desk, or major acoustic treatment after this point.
08

Select and check the measurement microphone

Choose the interface input used by the measurement microphone.

Select the correct microphone input.
Load the microphone calibration file when your microphone includes one.
Follow the level check and adjust microphone preamp gain or speaker level only when prompted.
Keep levels stable: once the level check passes, do not change interface output, monitor gain, or microphone gain during the measurement.
09

Complete all measurement positions

SoundID guides you through 37 microphone positions around the listening area.

Follow the visual positioning guide for every measurement.
Hold the microphone at the requested position and orientation.
Keep the room quiet and avoid standing between the microphone and either monitor.
Repeat any position that SoundID rejects.
10

Save the completed room measurement

The saved measurement becomes your calibration profile.

Confirm that the measurement process is complete.
Save the room response with a clear name, such as Studio Main Position.
Close the Measure application and open the main SoundID Reference application.
03 Choose and export the calibrationTarget curve, limits, and monitor export file
11

Select the new calibration profile

Open the main SoundID Reference application.

Select the audio interface outputs connected to your Image 2 monitors.
Select the measurement profile you just created from the profile menu.
Confirm that the measured response and correction curve load correctly.
12

Choose the target and correction limits

Set the calibration behavior before exporting.

Choose Flat Target, Dolby Atmos Music, Custom Target, or Translation Check as required.
Use the Limit Controls to define the correction range and maximum boost.
Set high pass and low pass limits when correction should only operate within a defined frequency range.
Recommended starting point: begin with Flat Target and conservative maximum boost. Large narrow boosts usually indicate a cancellation that EQ cannot properly repair.
13

Export the Image 2 calibration file

Save the file somewhere easy to find.

Click the three dot menu beside the calibration profile and choose Export.
Select the compatible studio monitor manufacturer entry.
Choose a clear folder and export the calibration file.
Keep this file. You will load the same export into both monitors.
Legacy software label: SoundID Reference may still list the export target as “Fluid Audio Studio Monitors.” Select that entry for Fluid Professional Image 2. This exact wording is controlled by the SoundID application.
04 Upload to both monitors and verifyStore the same profile in the left and right Image 2
14

Upload the profile to the left monitor

Return to DCT with the USB cable connected to the left Image 2.

Select the profile slot you want to use, from Profile 1 to Profile 4.
Choose Upload Profile and open the exported SoundID calibration file.
Confirm the sample rate is automatically set to 192 kHz.
Set the channel to Left.
Press Upload and wait for the progress to complete.
15

Upload the same profile to the right monitor

Both monitors must use the same calibration file and profile slot.

Move the USB cable from the left monitor to the right monitor.
Select the same profile slot used on the left monitor.
Load the same exported calibration file.
Change the channel to Right.
Upload and wait for completion before disconnecting USB.
Most common mistake: uploading both monitor files as Left, or storing them in different profile slots. Verify channel and slot before pressing Upload.
16

Select the profile and verify playback

Finish with a controlled listening check.

Select the same stored profile number on both Image 2 monitors.
Play a familiar reference track at moderate level.
Compare the calibrated profile with the bypass or uncalibrated profile.
Confirm that left and right level, tonal balance, and center image remain matched.
Keep the exported calibration file backed up with the room profile name and measurement date.
Calibration is now internal: after the profile is stored and selected on both monitors, SoundID correction runs in the Image 2 DSP. You do not need to keep the SoundID plug-in active for normal playback.
Setup complete

Your Image 2 system is calibrated

Keep the same profile selected on both monitors. Re-measure after meaningful changes to speaker placement, listening position, desk layout, subwoofer integration, or acoustic treatment.

Trusted by working professionals

SoundID Reference endorsed by Grammy Award winning creators

Engineers and producers use calibration to make monitoring decisions with greater consistency and translation.

Mark Needham in a recording studio
“What an awesome tool for managing my playback options for monitoring! I am loving this.”

Mark Needham

Multi platinum mixer, producer and engineer with 12 Grammy nominations. Credits include Fleetwood Mac, The Killers, Imagine Dragons, Shakira, Elton John and Stevie Nicks.

Maria Elisa Ayerbe working at a mixing console
“Speaker calibration made easy for anyone.”

Maria Elisa Ayerbe

Grammy Award winning audio engineer and producer. Credits include Mary J. Blige, Ricky Martin, Marc Anthony and Jennifer Lopez.

Rik Simpson in a recording studio
“I know for a fact that I would have liked to have had it when I was mixing the last Coldplay album.”

Rik Simpson

Multi Grammy Award winning producer, engineer, musician and songwriter. Credits include Coldplay, Jay Z, Portishead, Kasabian and PJ Harvey.

Brian Chirlo in a recording studio
“Sure, $10,000 monitors sound great, but are they still necessary? I can get the same mix out of $3,000 monitors and correction from Sonarworks.”

Brian Chirlo

Grammy Award winning mixing engineer. Credits include Snoop Dogg, Amy Winehouse, Tony Bennett and Freddie Cole.

SoundID Reference overview

See how SoundID Reference works

This short Sonarworks overview explains the correction workflow. Use the step by step guide above for the Image 2 export and monitor upload process.

For Image 2 owners

Try SoundID Reference for 60 days

Image 2 customers can access the full calibration workflow, including profile export for the monitor DSP.

Full functionality No credit card Profile export included
Claim the 60 day trial